
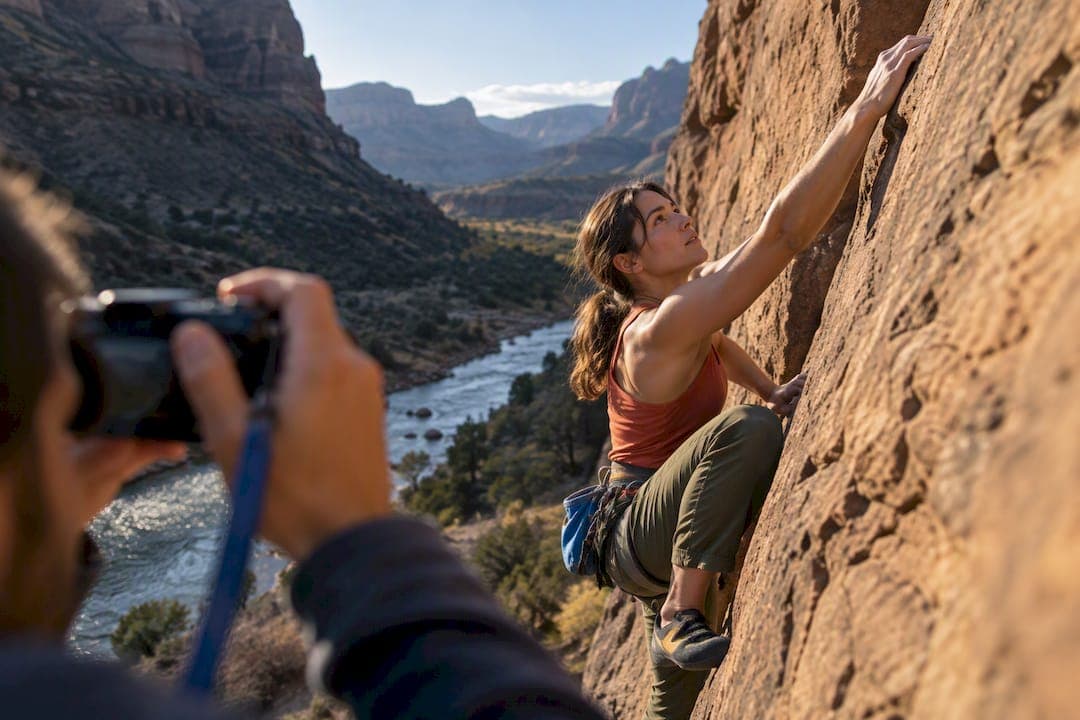
Prioritize three shots above everything else: a hero image that stops the scroll, an action shot showing the real experience, and a friendly guide or host photo. Authenticity beats polish: images that meet platform specs and show the tour as it truly runs convert better than staged or misleading ones. Once those three are locked in, build out the fuller shot list below.
TL;DR:
- The key images for a tour listing should include a landscape-oriented hero shot that captures an emotional peak, a proof-of-experience action shot, and a friendly guide portrait to build trust.
- Images must meet minimum technical specifications, ideally 2048 by 1366 pixels in JPG or PNG format, with a focus on clarity and honest representation, avoiding filters and exaggerated edits.
- Authenticity is crucial, so use real photos from tours, collect consent for recognizable individuals, and clearly disclose any AI-generated images to prevent expectation gaps.
- A well-structured gallery begins with the hero image, followed by action, guide, meeting point, safety, and detail shots, all optimized with descriptive filenames, captions, and alt text for searchability.
- Consistent, honest photography that accurately depicts the tour experience increases trust, attracts genuine bookings, and reduces negative reviews related to mismatched expectations.
Table of Contents
- The Prioritized Shot List Every Listing Needs
- Getting the Technical Specs Right Before You Upload
- Composition and Editing That Look Great and Stay Honest
- Choosing Authentic Sources and Handling AI Images Responsibly
- Captions, Alt Text, and Ordering That Help You Get Found
- A Quick Mobile Shoot Checklist You Can Run Today
- What Good Tour Photography Actually Signals to Travelers
- How Im-at Helps You Get Your Listing Photos Right
- Sources
- FAQ
The Prioritized Shot List Every Listing Needs
Your hero photo is the single most clickable image on the page, so it deserves the most care. Shoot it in landscape, keep the subject centered so it survives thumbnail cropping, and pick a moment that captures the emotional peak of the experience rather than an empty landscape.
The action shot backs up the hero by proving what participants actually do: paddling, climbing, tasting, painting; understanding this helps optimize business listing pricing by boosting listing performance through effective imagery. Peer-reviewed tourism photography research recommends balancing product-focused images, the detailed, credibility-building kind, with experience-focused images that carry emotion and movement, and notes that higher-priced activities benefit from more product-focused shots to build trust.
A guide or host portrait matters more than most providers assume. A small, clearly visible, smiling face builds trust before a stranger hands over money and shows up somewhere unfamiliar.
Round out the gallery with:
- A meeting point shot showing the entrance, signage, or pickup vehicle so guests recognize it on arrival.
- A safety or equipment photo, especially for higher-priced or adventure activities, to prove gear is real and well maintained.
- Context and close-up shots that show scenery, group dynamics, and any accessibility features.
Pro Tip: Shoot the guide photo outdoors in natural light rather than against a plain wall. It reads as candid instead of a passport photo.
Getting the Technical Specs Right Before You Upload
Platforms reject or shrink images that miss basic technical thresholds, so check these before uploading anything. Google's "Things to do" image guidelines recommend images at least 1024×683 pixels, ideally 2048×1366 pixels, with a preference for 1:1 or 4:3 aspect ratios.
Google recommends a minimum resolution of 1024×683 pixels and prefers 2048×1366 for full clarity, which matters because low-resolution images get compressed further and look blurry on retina phone screens.
- Use JPG or PNG only; other formats risk rejection or poor rendering.
- Avoid text overlays, watermarks, borders, or collage-style compositions, which platform guidelines flag as unacceptable.
- Keep the main subject centered, since thumbnail crops often clip the edges of a wide photo.
- Check the image on a phone screen before uploading. If the subject is unclear at thumbnail size, it will underperform in search results.
Composition and Editing That Look Great and Stay Honest
Good composition and honest representation are not in conflict, and the best tour photos manage both. Center your subject for the thumbnail crop, but use the rule of thirds within that frame for full-size viewing so the image still feels considered rather than static.
Avoid extreme wide-angle lenses on phones, since they distort proportions and make spaces look larger than they are. Partner toolkit guidance recommends enabling lens correction in your phone's camera settings to keep lines straight and preserve credibility.
- Shoot during golden hour when possible, since low, warm light flatters faces and landscapes alike.
- Use fill flash or reflectors for close-up guide portraits shot in harsh midday sun.
- Expose for the main subject's detail, not just the background sky.
- Skip heavy filters, strong HDR, or color grading that shifts the true tone of a location, since misleading color reads as dishonest once a guest arrives.
Pro Tip: Mix in one or two slightly imperfect, guest-style photos among your polished shots. A gallery that looks entirely professional can feel staged, while a blend signals it is real.
Choosing Authentic Sources and Handling AI Images Responsibly
Real photos from real tours beat any alternative, but sourcing them correctly takes some care. Guest-submitted photos, or user-generated content, add welcome variety and proof of a genuine experience, though you should confirm each one accurately represents the tour before publishing it.
Collect a signed or digital model release before featuring a recognizable guest or guide, particularly for close-up portraits used in marketing. This protects both the provider and the person photographed.
AI-generated images raise a separate concern. Research into AI versus real tourism images found that AI images can be rated as more attractive on some metrics, but the same study warns of an expectation-reality gap when travelers arrive to find the destination differs from the AI-generated image, and it recommends clear authenticity labeling.
- Never present an AI-generated image as an unedited photo of your actual tour.
- Disclose AI involvement clearly if you use any AI-assisted image at all.
- Prioritize timestamped, verified guest photos over stock or synthetic alternatives.
Misleading images create an expectation gap that shows up in reviews, refund requests, and repeat-booking loss, so accuracy protects your reputation as much as it protects the guest's experience.
Captions, Alt Text, and Ordering That Help You Get Found
Good metadata does double duty: it helps search discovery and helps guests with screen readers understand what they are looking at. A few rules keep it consistent across your whole gallery.
- Name files descriptively before upload, such as "sunset-kayak-tour-guide.jpg" rather than a generic camera file number, and compress images to reduce load time without visible quality loss.
- Write captions using a subject plus setting plus action formula, kept under roughly 125 characters, such as "Guide Thabo leads a sunrise kayak group through the lagoon."
- Write alt text the same way, describing what is actually shown rather than starting with "image of," since that phrasing wastes space and adds nothing for accessibility tools.
- Order your gallery with the hero image first, followed by action, then guide, then meeting point, then supporting detail shots, so the sequence mirrors how a guest mentally walks through the experience.
A Quick Mobile Shoot Checklist You Can Run Today
A short, repeatable routine keeps quality consistent even with just a smartphone. Run through this before, during, and after your shoot.
- Tidy the meeting point and gear, confirm signage is visible, and charge your phone fully.
- Turn on the camera grid, enable lens correction if your phone offers it, and shoot at the highest resolution setting available.
- Avoid digital zoom entirely. Move closer instead, since zoomed shots lose sharpness fast.
- Shoot in this order: hero, action, host or guide, meeting point, safety or equipment, then supporting detail shots.
- After the shoot, make light corrections only, such as brightness and crop, export at web-friendly file sizes, and rename each file descriptively before upload.
Pro Tip: Shoot the same scene twice, once posed and once candid mid-activity. You will often prefer the candid version once you compare them side by side.
What Good Tour Photography Actually Signals to Travelers

The biggest misconception providers have is that better-looking photos always win. What actually drives bookings is a gap between promise and reality closing to nearly zero. A stunning photo that oversells a modest experience generates clicks and then bad reviews, while an honest, well-composed photo that matches the real tour builds trust that shows up in repeat bookings and referrals.
The instinct to over-edit or over-polish is understandable, but the providers who do best treat their gallery as a preview of an actual afternoon, not an advertisement for an idealized one. Pick photos that would not surprise a guest standing at the meeting point.
— Mikahil
How Im-at Helps You Get Your Listing Photos Right
Listing an activity on a travel platform takes minutes, and the upload process is designed around the principle of clear, accurate photos that reflect the actual experience. Providers can upload their shot list directly, reorder images to lead with the strongest hero shot, and reach travelers browsing guided tours, trips, and outdoor adventures worldwide without any listing fee.
| Photo priority | Why it matters |
|---|---|
| Hero image | First impression, drives the click |
| Action shot | Proves the real experience |
| Guide portrait | Builds trust before booking |
| Meeting point | Reduces day-of confusion |
If you already run tours or experiences, create your listing on Im-at and upload a gallery that follows this shot order from day one.
Sources
For deeper reading, see Google's image and photography guidelines, the Expedia Group photo toolkit, and Travel Alberta's photo optimization guide.
- Image and photography guidelines | Google Actions Center | Google for Developers
- How to attract guests with stunning photography (Expedia Group photo toolkit)
- Peer-reviewed study on photography balance in tourism marketing
- Misguided Tourism in the Age of AI? Implications for Tourist Decision-Making and Destination Reputation
FAQ
What image size works best for tour listing photos?
Aim for at least 1024×683 pixels, with 2048×1366 pixels as the ideal target, since Google's image guidelines use these thresholds for clarity across devices. Stick to JPG or PNG format and avoid heavy compression that blurs detail.
Can I use guest photos on my tour listing?
Yes, guest-submitted photos add authenticity and variety, but confirm each one accurately represents the experience before publishing it. Collect permission from the guest, especially when a recognizable face appears in the shot.
Are AI-generated images allowed on tour listings?
Platform guidance generally discourages or prohibits AI-generated images without clear disclosure, since research on AI tourism imagery found it can create a gap between what travelers expect and what they actually experience. Real, unedited photos of your tour remain the safer and more trustworthy choice.
How many photos should a tour listing include?
Partner guidance commonly points to roughly nine photos as a useful benchmark for helping travelers make a booking decision, according to Travel Alberta's listing guidance. Cover the hero, action, guide, meeting point, safety, and detail shots within that range rather than repeating similar angles.
Should I crop or edit my tour photos before uploading?
Light edits like brightness and cropping for centered composition are fine, but avoid heavy filters, collages, or overlays, which platform image guidelines flag as discouraged. Keep the main subject centered so it survives thumbnail cropping without losing clarity.